Privacy statement: Your privacy is very important to Us. Our company promises not to disclose your personal information to any external company with out your explicit permission.
![]() June 30, 2022
June 30, 2022
Sewing machines are a marvel of engineering. They use a variety of mechanisms, mainly we can see needles and thread, to sew fabrics together. In this article, we'll explore the different components of a sewing machine, and how they work together to create the seam that we see on clothes. Then we enhance our understanding of sewing machines.

The sewing machine has a long and textured history, dating back to the early 1800s. The first sewing machines were powered by foot pedals and looked more like hand-held tools than the large, stationary machines we see today. Over time, the design of the sewing machine evolved, and its capabilities expanded. Today's sewing machines are typically computerized, with a variety of built-in stitches and settings. While the mechanics of how a sewing machine works have changed little over time, the technology that powers them has come a long way.
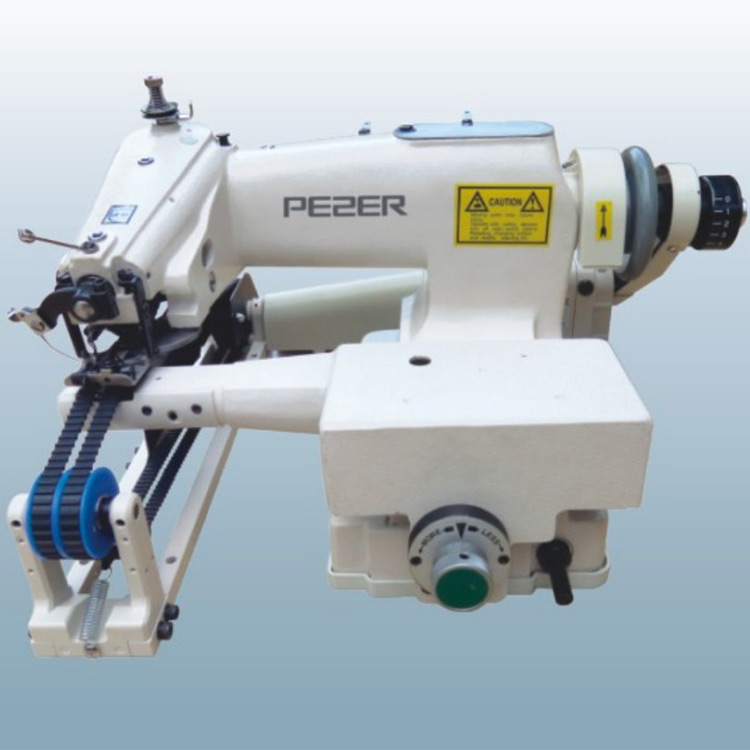
A sewing machine has many different parts, each with a specific function. The diagram below shows the most common parts of a sewing machine and their purpose.
A sewing machine diagram is a helpful tool for understanding the different parts of a sewing machine. The diagram shows the name of each part and what it does. It is important to understand these parts when taking care of a sewing machine and when troubleshooting problems.
1. Presser Foot - The presser foot is the part of the sewing machine that presses the fabric against the feed dogs. It is attached to the presser bar, which moves up and down to create stitches.
2. Feed Dogs - The feed dogs are a set of small, metal teeth on the bottom of the presser foot that helps to feed the fabric through the machine as it stitches. There are two types of feed dogs - horizontal and vertical.
3. Bobbin - The bobbin is a small spool of thread that sits in the bobbin case and feeds up through the needle plate to form the stitches.
4. Bobbin Case - The bobbin case holds the bobbin and supplies the thread to sew with. It also contains a small screw that keeps it closed. The bobbin case is where the bobbin is housed.
5. Needle - The needle is used to attach the thread to your fabric. The needle goes through the fabric to create stitches. There are different types of needles depending on what type of fabric is being sewn.
6. Needle plate - The needle plate is the part of the machine that holds the sewing needle and allows you to sew.
7. Presser Foot - The presser foot sits on the bottom of the machine, and is used for things like pressing or sewing light fabrics, like cotton. The presser foot holds the fabric in place as it is sewn.
Chain stitch sewing machines were once the most popular type of sewing machine. Today they are mostly used for ornamental and decorative stitching. Chain stitch machines can be manual or electric. The chain stitch process is very simple, making it a popular choice for beginning sewers. In a chain stitch, the needle goes up and down to create a loop of thread, which is then pulled through the fabric. This loop is then cut, leaving a small knot at the end of the stitch.
Lock stitch is the most common type of stitching on a sewing machine. This stitch locks the thread in place so it doesn't unravel. It's also the strongest and most durable type of stitch. In this animation, you'll see how to sew a lock stitch using a sewing machine.
It is important to clean your sewing machine before you start using it. Dust and dirt can get into the moving parts and cause them to wear down. To clean your machine, unplug it and remove the needle plate. Use a brush or vacuum cleaner to remove any dust or debris from the inside of the machine. Be careful not to damage the motor or other delicate parts. Replace the needle plate and plug it into your machine. Turn it on and let it run for a few minutes so that the lubricant can spread evenly. Now you're a few steps away ready to sew!
Threading a sewing machine can be a little tricky the first time, but it's not too difficult. Here are the steps:
1. Open up the machine and locate the bobbin case. The bobbin case is the small metal box in the middle of the machine.
2. Pull out the bobbin case and look at the top. You will see a small hole.
3. Thread the bobbin case with a new spool of thread. Make sure that you have a needle threaded on the needle plate and that the thread is not too loose or too tight.
4. Insert the needle plate into the hole and tighten.
5. Feed the thread from the spool through the feed dogs, pull it tight, and knot it at the end.
There are a few ways to wind a bobbin, but the most common is to use the hand crank. First, place the spool of thread on the spindle and hold it in place with your left hand. With your right hand, turn the hand crank clockwise until the bobbin is full.
Sewing machine feet are attachments that go on the bottom of a sewing machine. They help to guide the fabric and make different stitches. There are many different types of feet, and each one has a different purpose.
Sewing machines can be intimidating for beginners, but with a little practice, you'll be able to create all sorts of projects. Start by familiarizing yourself with the different parts of the machine. There are typically four main parts: the needle, the bobbin, the foot pedal, and the control panel. Make sure that your machine is threaded correctly before you start sewing. The thread goes from the spool on the top of the machine down through the needle and then back up to the bobbin, which is located under the needle plate. To sew, hold down the foot pedal and guide your fabric through the machine with your hands. Keep your stitches even by pressing down on the fabric evenly with each pass of the needle. When you're finished sewing, remove your project from the machine and cut off any excess thread. Congratulations - you've just sewn your first project!
Once you have threaded the sewing machine and put the bobbin in place, you're ready to start sewing. The first thing you need to do is adjust the tension of the thread. This can be done by turning the knob on the right-hand side of the machine. You want it to be tight enough that the thread doesn't easily pull out, but not so tight that it's difficult to sew. To sew a straight line, you'll need to adjust the position of the needle. To do this, turn the knob on the left-hand side of the machine. You want the needle to be in the middle of the fabric. Then hold down both pedals with your feet and slowly push them forward until you hear a clicking noise. This will start up the machine. Gently guide the fabric through while keeping your hands close to it.
When sewing a curve, you'll need to adjust the machine's settings to make sure the fabric moves smoothly. To do this, loosen the tension on the needle thread and lengthen the stitch. You may also need to use a stabilizer to keep the fabric from stretching. Sew slowly and gently, making sure to keep the fabric taut as you go.
There are a few things to know before you start using your sewing machine. First, make sure the needle is inserted correctly. The flat side of the needle should be facing the back of the machine. Second, always use a Singer-brand or equivalent thread in your machine. The quality of the thread will affect the quality of your stitches. Third, adjust the tension of the thread by turning the small knob on top of the machine. You want it to be tight enough that the stitches don't come undone, but not so tight that they're difficult to pull through the fabric. Now let's learn how to sew a basic straight stitch. To do this, you'll need two pieces of fabric and some thread. Begin by placing one piece of fabric underneath the presser foot and securing it with your fingers or a clipper clip.
section 1 Locate the Reverse Stitch Button
Almost all sewing machines have a reverse stitch button. This is used to back up your stitches, in case you need to rip out a seam. To use the reverse stitch, simply press the reverse stitch button and sew in the opposite direction.
section 2 Use the Reverse Stitch for Repair Work
If you need to do some repair work on a seam, use the reverse stitch to make sure the stitches are strong and secure. This will help keep your fabric from unraveling.
section 3 Use the Reverse Stitch for Applique Work
When you're doing applique work, it's important to use a strong stitch. The reverse stitch is perfect for this type of work because it makes a very sturdy seam.
The above is the How Does Sewing Machines Work we have listed for you. You can submit the following form to obtain more industry information we provide for you.
You can visit our website or contact us, and we will provide the latest consultation and solutions
Send Inquiry
Most Popular
lastest New
Send Inquiry
Send Inquiry

Mr. Alston Chen
Tel:86-769-18902616250
Fax:86-769-88285668
Mobile Phone:+8618902616250
Email:sales02@chuanghuisew.com
Address:26-28 Zhenglu south, chuancha village, Machong Town, Dongguan City, Guangdong Province., Dongguan, Guangdong
Related Products List
Mobile Site


Privacy statement: Your privacy is very important to Us. Our company promises not to disclose your personal information to any external company with out your explicit permission.

Fill in more information so that we can get in touch with you faster
Privacy statement: Your privacy is very important to Us. Our company promises not to disclose your personal information to any external company with out your explicit permission.